Introduction
The camera head is used as part of the calibration procedures of the FirePick Delta. See the extensive firenodejs documentation here to find out how.
Bill Of Materials
| ID | Qty | Name | Size | Material | Process | Filename | Get |
|---|---|---|---|---|---|---|---|
| 4.2.1. | 1x | M36 T38F End Effector | PLA | Printed | 3DLC1028 M36 T38F Effector | STL | |
| 6x | DBS-0.375-10La ball stud | Sourced | |||||
| 6x | M3 nuts | Sourced | |||||
| 4.2.2. | 1x | NeoPixel Ring 16x WS2812 | Sourced | Sparkfun | |||
| 1x | 1000 uF Capacitor | Sourced | |||||
| 1x | 470 Ohm Resistor | Sourced | |||||
| 4.2.3. | 1x | M36 M5 Plug | PLA | Printed | 3DLC1033 M36 M5 Plug | STL | |
| 1x | Raspberry Pi Camera Mount | PLA | Printed | 3DLC1032V M36 PiCam Mount | STL | ||
| 1x | Raspberry Pi Camera Module - Pi NoIR | Sourced | Sparkfun | ||||
| 1x | Ribbon FPC 15pin 0.5mm Pitch 75cm flat Cable for Raspberry Pi Camera | Sourced | ebay | ||||
| 1x | M5x10 bolt | Sourced | |||||
| 1x | M5 nut | Sourced | |||||
| 2x | M2x12 bolt | Sourced | |||||
| 2x | M2 nut | Sourced |
NeoPixel Ring Sizes
There are different ring sizes available depending where you buy the NeoPixel. Some rings sold on other websites (i.e AliExpress) have 68mm outer diameter (OD), while the original NeoPixel has 44.5 mm OD. 3D printed parts here are designed for the 44.5mm NeoPixel.
Assembly steps
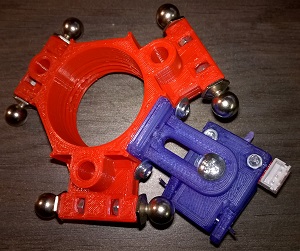
4.2.1. End Effector
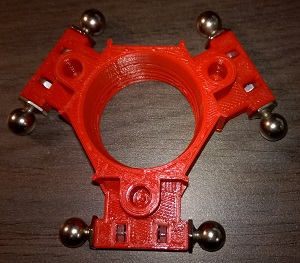
- Assemble the end effector by pushing the M3 nuts into the 6 holes and screwing the ballstuds in.
- Screw and unscrew the M36 M5 plug into the end effector several times to smoothen both threads.
4.2.2. NeoPixel Ring
![]()
- Solder two wires for powering the NeoPixel Ring; Add a 1000uF capacitor across the power leads.
- Solder one wire on the data input of the NeoPixel Ring; Put a 300-500 Ohm resistor in series.
4.2.3. Camera Mount
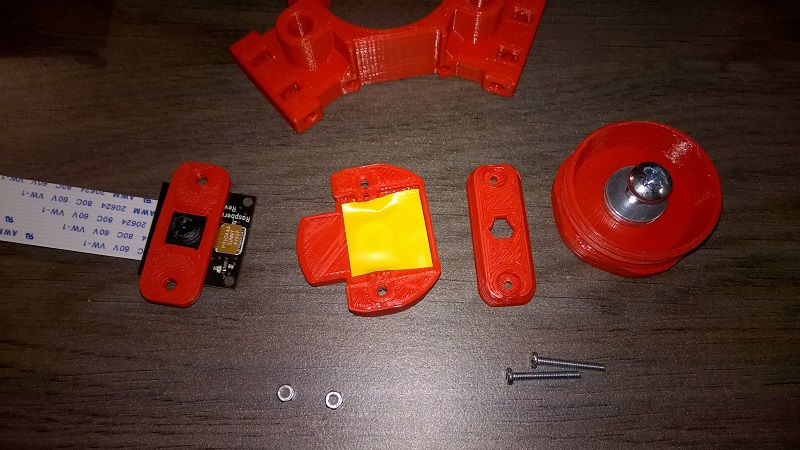
- Put the M5 nut in the appropriate place of the base bracket (I covered the nut with some tape to avoid short circuits on the PiCam PCB while screwing the bolt in)
- Take the bracket with the square hole and attach to the camera
- The bracket with the hexagonal hole can be used to adjust the camera focus. Depending on the Z height of your bed the focus must be adjusted to get sharp images of the calibration grid. I used this video as a reference.
- Put the camera on top of the base bracket, put the NeoPixel Ring on top and finish with the bracket with the hexagonal hole.
- Use the M2 bolts and nuts to hold the pieces together.
![]()
- Put the M5 bolt into the hole of the M36 M5 plug (I used some washers because I only had larger M5 bolts)
- Put the two parts together and screw the M5 bolt into the M5 nut
![]()
4.2.4. Putting it all together
- Screw the camera mount into the end effector
- Mount the end effector on the FirePick Delta
- Connect the PiCam to the Raspberry Pi
- Connect the NeoPixel ring on the servo 4 output of the RAMPS board. Follow the AdaFruit instructions ('Avoid connecting to a live circuit')
4.2.5. Testing
- You can test the NeoPixel Ring using these firestep commands
- Print the calibration grid, put it on top of the FPD bed and align it with the X-axis
- Open firenodejs and watch the camera output. Align the camera with the printed calibration grid by (un)screwing the camera mount a little.
Remarks
This end effector allows you to mount whatever accessories on three different sides using an M5 angle bracket. See the picture below for a Z-probe example